
A landing page attracts visitors and creates an impression that checks the utmost standards of user experience, interface, and overall user journey. You must think I’m exaggerating much, but the fact is that visitors are always looking for something that stands out.
Creating a website is much more than just creating a few web pages, it’s about creating a digital avenue for your brand. And what forms the most important part of a website: Landing Pages.
You must be wondering what’s the importance of landing pages on a website. A website is a collection of pages, but landing pages are thought, crafted, and positioned with one and only one aim: Conversion.
In this article, we’ll go through the process which will take you through how to create a landing page in WordPress.
There are 2 ways in which you can make an attractive landing page in WordPress: with a plugin and without a plugin. Both options offer a lot of flexibility and design options to create a page that actively engages the audience and leads to maximum conversions.
Now, let’s…
Create a Landing Page in WordPress with a Plugin
Step 1: Choose a Landing Page Builder Plugin
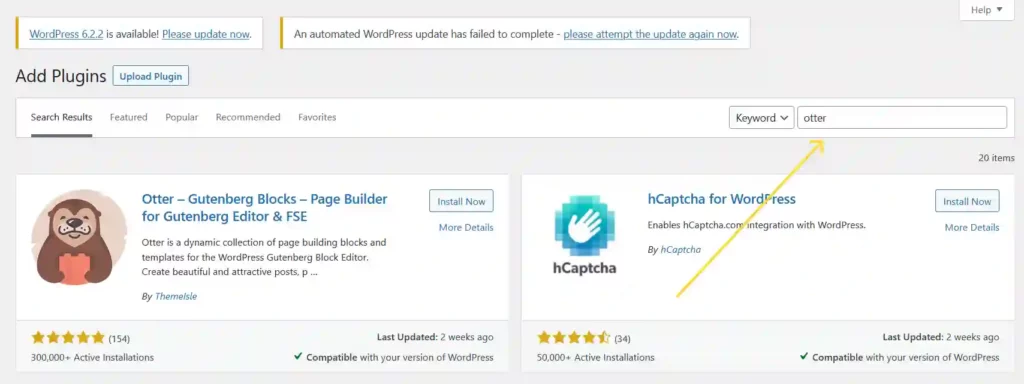
When creating a landing page in WordPress, the first step is to choose a landing page builder plugin that enables you to unleash your creativity and also provides you with a plethora of pre-designed templates to choose from. For this, I recommend these plugins: Otter, LightStart, Landing Page Builder, Visual Composer, SeedProd, ConvertKit.
In the above choices, a few come as a drag-and-drop builder to make this process easy and quick, especially for those who don’t know much about how to create a landing page in WordPress. For those with little to no coding experience, this is the best option. So, if you don’t want to put too much effort and just want to start with landing page building for your WordPress website.
Step 2: Install and Activate Your Plugin
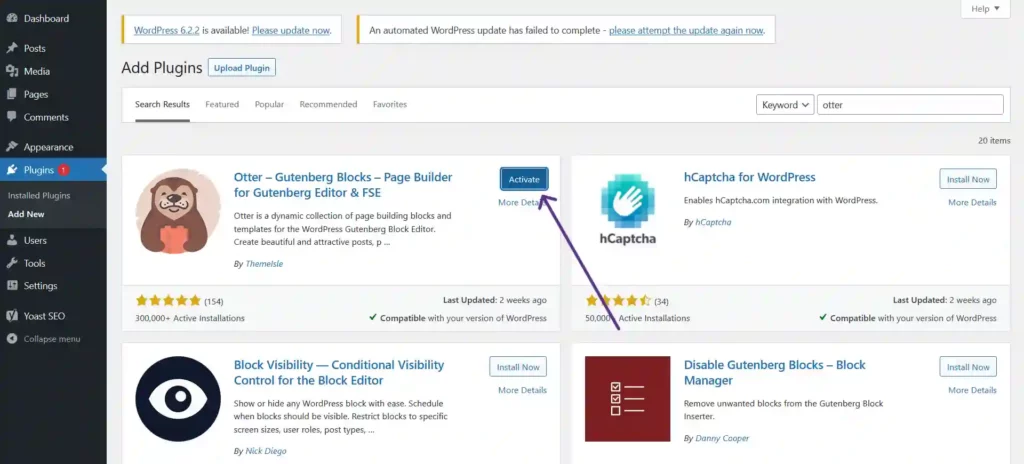
Go to your WordPress dashboard, navigate to plugins, and then click on the “Add New” button. Type in the name of the plugin or you can also type in what you want. In this case, you can type in the landing page and you’ll see the results. Take your pick, click “Install”, and once the installation is complete, click on “Activate”.
Step 3: Start building Your Landing Page
After activating the plugin, you can start your landing page building. You can either start from scratch or select a pre-designed template and start adding information about your product, service, or brand.
Step 4: Choose a Template or Start from Scratch
Once you create a new page, and decide whether to start from scratch or take a pre-designed template. Then all you need to do is design it as per your brand strategy, showcasing it the best way possible and making sure it does the job of not only converting visitors but also providing an experience that turns them into fans, brand advocates!
If you choose to start from scratch, you can use the drag-and-drop interface, different types of blocks, etc. WordPress gives you great features and functionality to create a landing page in WordPress that you want, that you imagine!
Step 5: Customize Your Landing Page
Once you’ve chosen a template or started from scratch, you can customize your landing page to match your brand and the specific goals of your landing page. This includes editing the text, changing the colors and fonts, and adding images and videos.
You can add and customize different elements of the landing page, such as images, text, videos, buttons, and forms. You can also make use of WordPress Patterns to add beautifully designed ready-to-use layouts to build your landing page.
One of the most integral parts of a landing page is to optimize it and build it in such a way that it includes a clear and direct CTA (call-to-action). This ensures the page loads quickly and directs visitors to the information that is crucial to convert them.
Step 6: Preview and Publish Your Landing Page
Once you’ve created and customized the landing page of your WordPress website, make sure that everything looks great and functions as desired. You can do this by clicking on the “Preview” button. When satisfied, you can make the page live on your website by publishing it. For this click on the “Publish” button and you’re all set!

You can then promote your landing page using social media, email marketing, or paid advertising.
This right here is how to build a landing page in WordPress with a plugin. Now, let’s get on with a much more immersive and creative way to build a landing page in WordPress.