With the daily addition of new blocks and features to the Gutenberg block editor, the restrictions for editing your website is constantly shrinking. These updates are not gonna stop anytime soon as the requirements of the users for new blocks and features is constantly expanding.
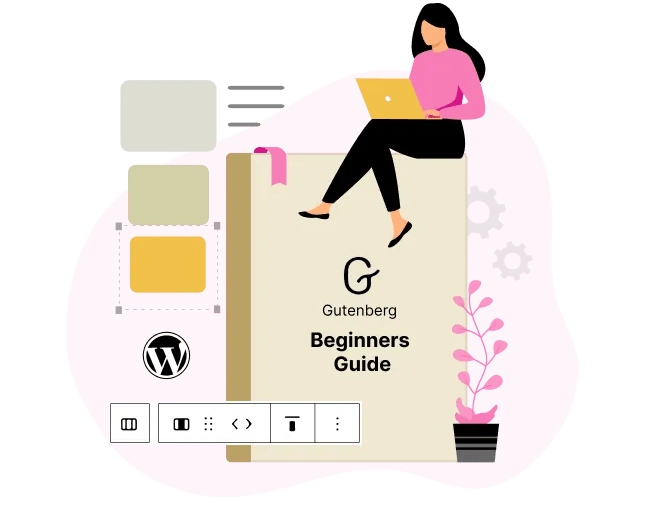
But for someone who is just starting with WordPress, looking at those blocks and learning about their fullest potential could get a little overwhelming. So, in this article, I will be explaining and exploring some of the basic blocks that are present in WordPress.
But, before we start I just want you to know that this article can be considered as a sequel to “Journey of Gutenberg”. Which explains about the TinyMCE editor, the need for the Gutenberg editor, and its evolution in detail.
Creating a new blog post or page using the block editor
Before creating a new blog post or blog page, it is important to know the difference between them. Blog pages are used to display static content, whereas blog posts are for creating content that is updated regularly. Now that you know the basic difference between them, let’s create one.
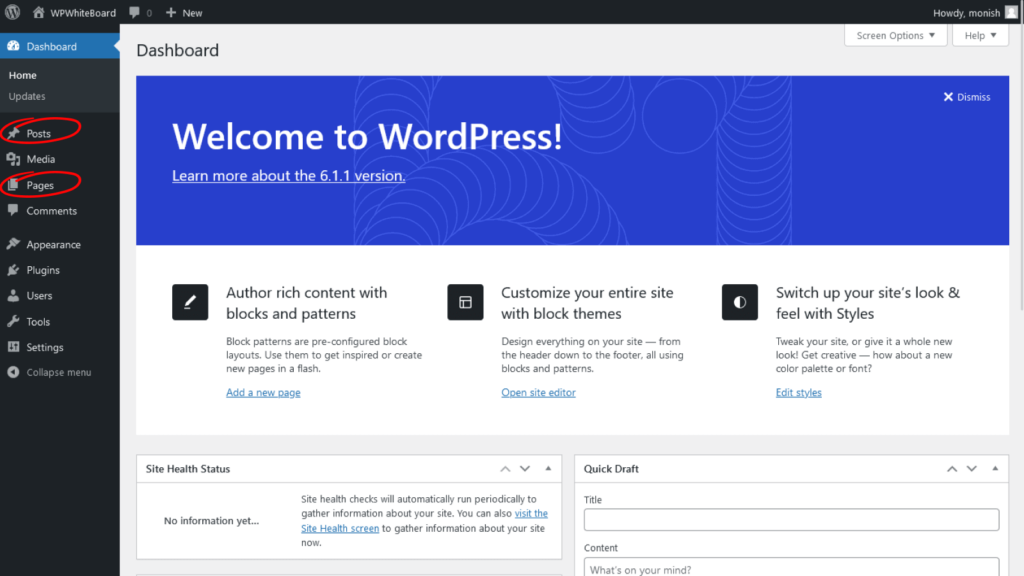
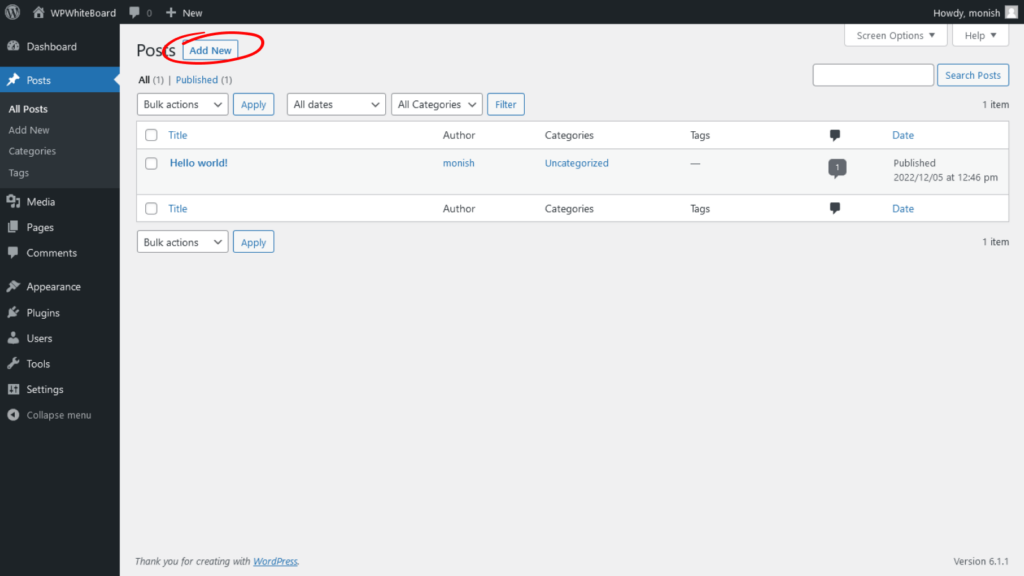
As soon as you land on the WordPress dashboard you can see ?Posts on the left side. Click on Posts > Add New from the menu to add a new post. If you are creating a new page then click Pages > Add new. Doing this will take you to the Block editor.
Adding Blocks to the Gutenberg Editor
The first block of every post or page is the title. You can add the title of the page or post to this block. Then press Tab or move the cursor down to land on the next block.
By default, the next block is the paragraph block. You can start writing your content right away. The user interface is similar to word processors like MS Word, Google Docs, etc, if you want to write text-only content.
However, if you want to offer your audience something different, then you can click on the add new block button (+) on the top left corner of the editor or the one that is present on the right side of the block.
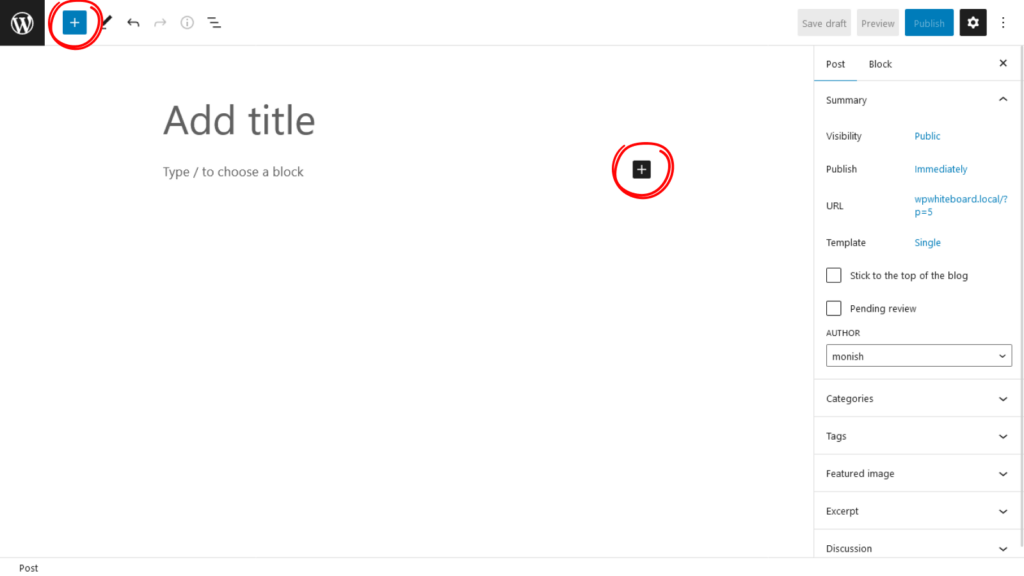
This opens the block inserter menu with a number of blocks. The blocks will be divided into various categories like text, media, design, widgets, theme, etc. Select the block you want from the menu or use the search option if you are looking for a specific block. You can also use the shortcut “/” to quickly choose a block.
Removing Blocks
Accidentally added a block that you don’t need? Got overwhelmed while browsing through the block inserter menu and added unnecessary blocks, just like I did?
Don’t worry removing a block is as simple as adding one.
Select the block you want to remove > Select the three dots at the right of the block menu > Select the Remove block option.
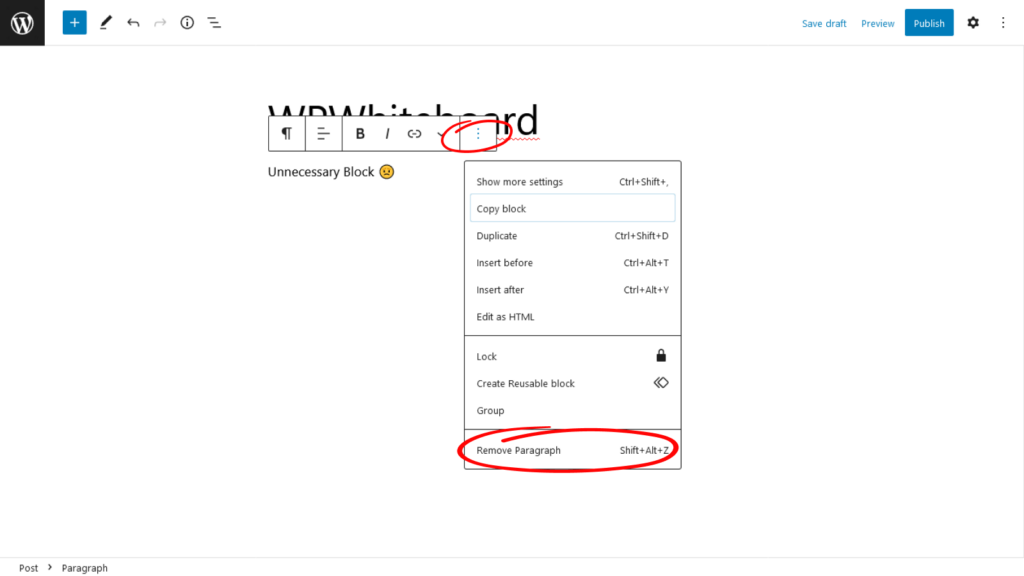
You can also just select the block and click the backspace or delete button to remove the blocks.
Conclusion
The block editor takes some time to get used to it, but once you are done there is no one stopping you from creating your own WordPress website. So, I highly recommend you to start experimenting with the Gutenberg block editor today, sire!
With the recent release – WordPress 6.1 and Twenty Twenty-Three theme the site editing got more friendly and intuitive. So, do check those themes also.
And, What’s next?
The block editor has more than 90 different blocks under six different categories. But don’t worry I will be covering them in my upcoming articles and also shed some light on other parts of block editor like Full-site editing. So, stay tuned and subscribe to WPWhiteBoard!